Custom Fixture location Windows
C:\Users\USERNAME\QLC+\Fixtures
Start QLC with web controller:
add --web to the target name.
Custom Fixture location Windows
C:\Users\USERNAME\QLC+\Fixtures
Start QLC with web controller:
add --web to the target name.
This is some info on the vivid 4 wall panels.
Panel files
Right from Chauvet site
Or local files
Upgrading "rcfgx" Configuration files using Novastar app
Launch it
User -. Advanced Synchronous system user login
password "ADMIN"
Goto "screen configuration"
Select "NEXT" (assuming you have a com port selected for your wall)
Select receiver, then select your file and update. Dont forget to click save at the bottom when the process is done.
Controlling OBS using PowerPoint with VBA code
This is a document in progress, mostly for me to remember how I did this, I'll update as I go.
This document explains how I make PowerPoint control OBS scenes. It goes with this video
So in our church, we use PowerPoint, as slides are advanced for the service, to send commands to OBS to move the cameras (PTZoptics) and change the different scenes in OBS to reflect the scene we want.
In our building, we use 2 different computers, one for PowerPoint, one for OBS.
1> The first part was to install OBSwebsocket plugin into the OBS computer. Pretty straight forward install, activate it and setup a password.
2> Install OBSwebsocket plugin onto the PowerPoint computer. This basically allows the .exe component of obswebsocket to be present to send remote commands via .bat files
3> Create a PowerPoint document, create a VBA macro and paste the following code into it. Here's a googledrive link to the basic code VBA script
4> Create .BAT files on the powerpoint computer with syntax similar to the following:
OBSCommand.exe /server=OBSipADDRESS:4444 /password="YOURpassWORD" /scene="SCENEnameEXACT Spelling"
Save this file something like 001.bat. You can test this right now by running the .bat, you should see OBS change to the secene in you have selected.
5> In your PowerPoint Document put in the first line of the presenter notes the following:
cmd-001-000
6> Start your presentation, then activate the macro.
7> Go to that slide, you should see the slide change
Now add more .bat files with different scene. For example 002.bat
In your PowerPoint you can put 2 commands per slide
cmd-001-002
When you run this above command, OBS should goto the scene in your 001.bat file, then about 2 seconds later, goto the scene in 002.bat file.
;tl;dr at the bottom.
OBSwebsocket plugin running on OBS and on the PowerPoint computer
PowerPoint with this VBA script
Create a PowerPoint and put in the presenter notes this: cmd-000-000
Replace the 000 with names of for matching .bat files in the path.
First, make sure that file is in windows\syswow64
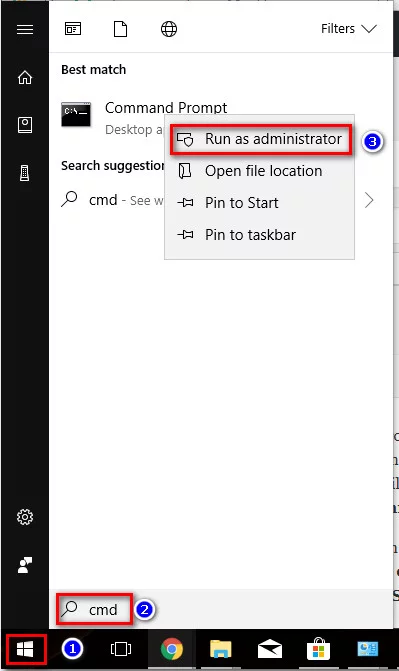
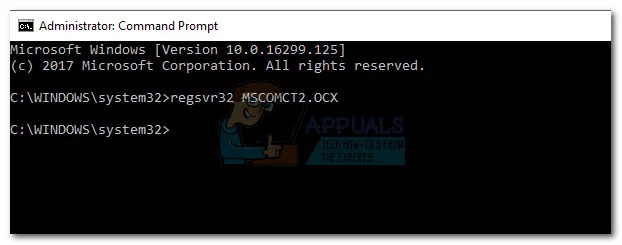
Then open a CMD prompt as administrator and enter in
regsvr32 \windows\syswow64\mswinck.ocx
That should take care of it.
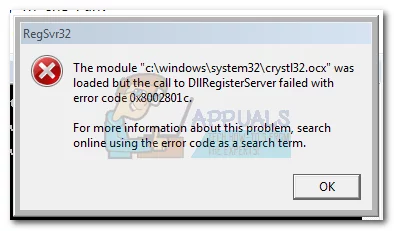
The error 0x8002801c occurs when there’s a problem accessing the OLE (Object Linking and Embedding) registry. Insufficient system permissions will trigger this error code when the registration of an OCX (OLE control extension) file fails to complete. This is known to happen frequently when using regsvr32 via Command Prompt on Windows 7.

It’s a common occurrence to see this error code when trying to register an OCX file from C:\ Windows\ system 32. Most of the time, the call to the DLLRegisterServer fails because of a permission problem and has nothing to do with the actual OCX component that you are trying to register.
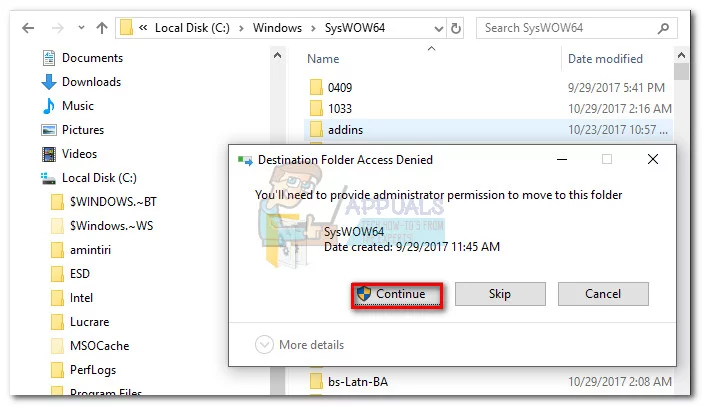
Fortunately, the error 0x8002801c can be avoided by copying the OCX file to C:\ Windows\ SysWOW64 and repeating the operation with administrator privileges. If you’re currently dealing with this issue, follow the step by step guide below to eliminate the error 0x8002801c and successfully register your OCX File.
 Note: In this case, the file name is MSCOMCT2.OCX, but you can replicate this procedure any OCX component that fails to register.


That’s it. You can use these four steps to grant proper permissions to any OCX file that is causing the 0x8002801c error code. Most of the time it will allow you to register the ActiveX component and eliminate the issue.
Save a Voice recording into a MySQL database
Here is an example of an Asterisk dialplan that asks for a voice recording and then saves it into a MySQL database:
[macro-record-and-save]
exten => s,1,Answer()
exten => s,2,Record(recording:/tmp/recording)
exten => s,3,System(mysql -u [username] -p[password] -h [host] [database] -e "INSERT INTO recordings (filename) VALUES ('/tmp/recording')")
exten => s,4,Hangup()
This is a kind of high-level setup of X120 cameras.
Essentially:
Cameras will need to be accessible from the IP network as the controller. You can HTTP to each camera's ip address and lock in an IP address.
Then use the IP controller app SONY PTZ SRG-X120 - Google Drive called "RM-IP"
Make sure that you have the cameras setup into group and with unique names. The group number coincides with the RM-IP10 controller.
On the controller itself there are two rows of DIP switches. Bottom row, #8, you set to on to allow writing. Power cycle the controller, the lights on the controller will blink continuously.
Go to the RMIP app, and you should be able to select the controller (assuming all on same network).
under "CAMERA TABLE" what I do is select the spots that I want to occupy a camera, then use "AUTO ASSIGN" then assign the IP range(s) of the cameras I want.
Apply it, and then once you have done that. Flip the switch 8 on the controller back to normal position and power cycle it. Should be good to go.
Here's how you get multiple RTSP streams working on a SRG-X120 camera
By Default, 1 RTSP stream is configured. All you have to do to make it work is go to your device that you want to get the video and create a rtsp connection like this:
rtsp://IP_of_CAM/video1 rtsp://IP_of_CAM/video2 and rtsp://IP_of_CAM/video3
You have to activate video2 and video3.
Go to SETTINGS -> VIDEO -> VIDEO CODEC
In the drop box, select "H.264" and then you can adjust the other settings if you want.
Default might be enough.
Click on "OK"
Here's an example in OBS connecting to the second RTSP stream using a "MEDIA Source"
put in the URL (same url for VMIX)
rtsp://IP_of_CAM/video2 /video2 or /video3
Remove "INPUT FORMAT" entry.
Here's a bit of info on how to setup a SRT config on an SRG-X120 camera.
First, you'll need version 3.0 of the firmware
You can go to Sony's page to get the firmware and instructions how to update
1> First, to get SRT activated, go to Settings-> Audio-> SEND = Enabled -> OK
2> Then you go into your camera, go to SETTINGS - STREAMING
Settings - Initialize -
Select the firmware you want to apply om tje
Version Up section
Factory HTML Password
Username: admin
Password: Admin_1234