Here's how to get QLC to work with Synesthesia (Synesthesia.live) using the OSC protocol.
NOTE: You need to have the licensed version of Synesthesia.live to have OSC controls. Its not available on the free version
This document also may help you getting QLC to work with OSC in general, as I think some of the setup steps will apply to other systems.
The assumption is that QLC and Synesthesia.live are running on the same computer. We'll be using 127.0.0.1 local network address. IF that is not the case, you will need to change those values to match the IP of your QLC and Synesthesia computers.
The very first thing that you have to do to make this work is create a QLC profile.
So go to INPUTS/OUTPUTS and select a UNIVERSE.
Now if you are using QLC for DMX control already, you are likely using "UNIVERSE 1" by default, so you will need to pick a different Universe. In my example I'm going to use "Universe 4". (its simple to change the universe used at a later time so its up to you)
So select Inputs/Outputs, select UNIVERSE 4, then select "OSC 127.0.0.1 INPUT and FEEDBACK" boxes
Double click on the "OSC 127.0.0.1" entry and you should see a box pop up like this:
Set the INPUT port to
7700 and the OUTPUT port (both entries) to
9000Press OK
Now select the PROFILE tab
Now select the green
+ button on the right to add a new profile
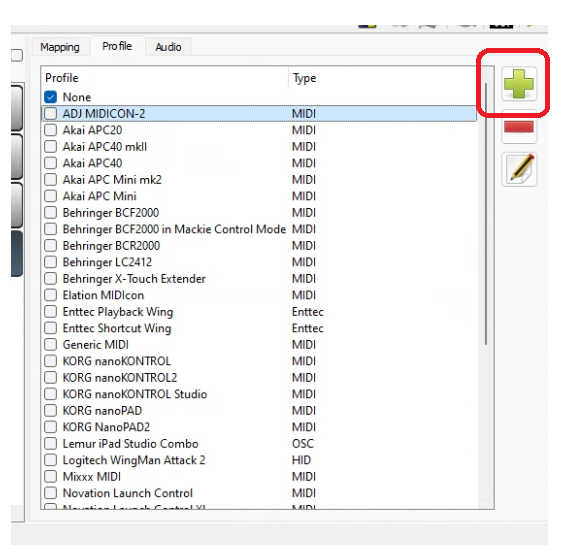
Give it a Manufacturer name, and Model Name and then set the TYPE to OSC
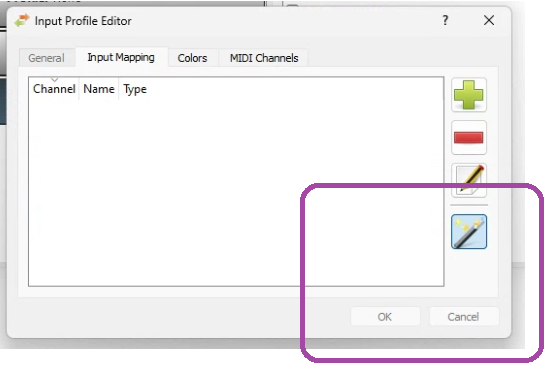
Click on INPUT MAPPING tab at the top
This bit is where you map the "OSC PATH" naming convention to Channel Numbers that are used by QLC. With the default behavior of Synesthesia, when it starts up, it will broadcast a large number of its controls by default, which will make mapping of Synesthesia functions to buttons in QLC, like the way you would map a button or slider to a DMX fixture.
Click on the bottom button
A popup box with the follow will appear. Click on "
OK"
QLC is now in a "listening" mode, waiting for an OSC compliant device to broadcast its values
You will notice that the little "wizard" button is active, and the "OK" button is grey'd out.
Leave this QLC window open, and launch Synesthesia.live
Select the SETTING (gear) button in Synesthesia and scroll down to "OSC"
Toggle the
INPUT and
OUTPUT boxes to green.
Set the INPUT PORT to 9000 and the OUTPUT PORT to 7700
Set "Output Control Values" to "Output Normalized Values"
Set "Control Address Format" to "Scene-Specific Address"
Leave OUTPUT Address to 127.0.0.1
Once the OSC values match the above, close then relaunch Synesthesia.live
Now go back to your QLC Input Mapping Window.
If you have the ports/IP setup correctly, you should see values in side the box similar to this:
Click on the
Wizard button to deselect it, then press "
OK" which should now be active
Now with QLC+, in order for the buttons to function, at minimum they need to be assigned to a scene with a fixture. These fixtures are dummy values within QLC, so you don't need any real DMX lights. You just need to create some fake ones.
In the Fixtures tab in QLC, click on the Green PLUS button to add a fixture.
Search for "Generic"
click on the Generic fixture
Set the Universe to "Universe 4" (this is especially important to prevent these fixtures DMX address from needlessly clashing with other real DMX fixtures if you are using this program for both.
Click on "OK"
In QLC click on the FUNCTIONS tab then click on the "SCENE" button
Click on the green button to add a dummy fixture to this button
Give the scene a unique Scene Name. In this example its called "O1"
Click on the tab that will be called "Dimmers"
Click on the box above the little light bulb to put a check mark in it.
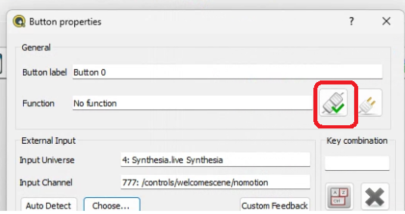
Go to the "Virtual Console" window in QLC+
Create a new button, and go to button properties -> External input "
CHOOSE"
You'll see a drop box with the name of your OSC Profile, in this example "Synesthesia.live"
Click on the first on "777: /controls/welcomescene/nomotion" then press "OK"
You'll see the "External Input" section will now be populated like this:
At the top of this box, click on the "Function" button
Select the scene created earlier and press OK
It will now look like this:
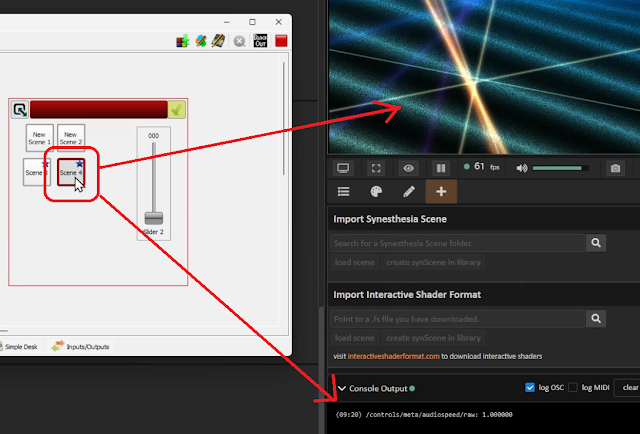
Now start up QLC
For this example, launch Sythesia, you should see the default logo spinning:
Now if all is setup right, and you press the button you created in QLC, that logo should change to a static image with the title synesthesia below the logo.
I hope this worked for you!
Now you can go a create more buttons or faders
Here's an example of what a fader setup would look like that will act as a dimmer
Here's some other possibly helpful information:
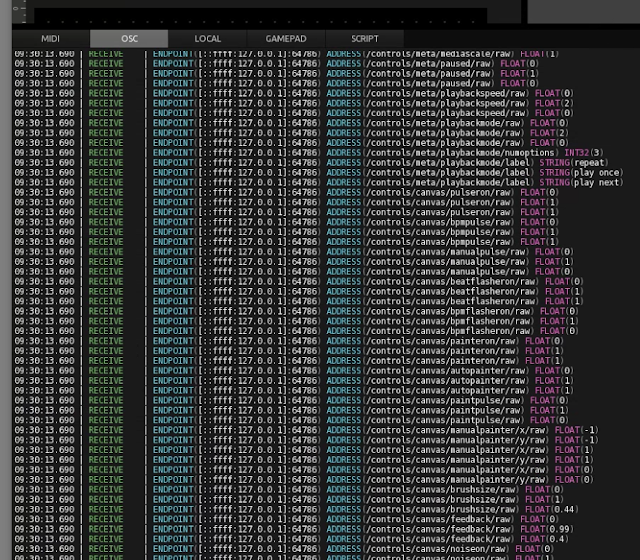
There is a Synesthesia log that might help:
Activated OSC LOGGING in synesthesia console
If some Synethesia elements are not found in the QLC profile, you can find them in Synesthesia by click on the OSC button in the upper right corner, then selecting the feature you want.
For example, the scene called "Canvas" as a "Noise On" button that isn't found by default. To find (or other buttons) bring up your Input Profile Editor in QLC and click on the "automatic add" button.
With it waiting for an input, click on the value you are searching for in Synethesia. It should appear in the list
you'll see this "Noise On/Off" value appears in the list now. You can add that as a button.
To select different scenes, use the OSC path /scenes/scenename
Example:
/scenes/iterationdisposal
/scenes/aliencavern
Then you can assign it as a button
If this tutorial has been of any help to you, I'd love to know!
If you have suggestions of how to improve it, let me know in the comments! Thanks!
--------------------------------------------------------------------------------------------------------------------------
Below are some notes and screen shots I made up while working on this document and learning OSC protocol with Synesthesia and QLC+. I'm leaving it here in case any of it is helpful.
The OSC path is /controls/meta/limitcolors
QLC doesn't recognize these types of "path" statements, , it wants numeric. But it has a calculator built in the port setting.
by going to Inputs/Outputs, and double clicking on the OSC entry (127.0.0.1) the OSC Plugin Configuration window will come up, and there is a 'calculator' at the bottom.
Enter in the OSC path of "
/controls/meta/limitcolors" that Synthesia wants, and append
/raw to the end.
You will get a value of 49747
Under the OSC option, double click the box and enter in the value the calculator gave you (49747 in our example) however increase the value by 1. So the value will be 49748
We'll use the value of 62883. This OSC path gives a value in the QLC calculator of 62882, and we add a 1 to the value.
OSC expects "path" values like this to control elements:
/playlist/next
/playlist/previous
/controls/banks/scene/default
/controls/banks/meta/random
(manual for reference) https://app.synesthesia.live/docs/manual/osc.html
In Synesthesia, you click on the "OSC" button in the upper right corner, it will highly a shade of purple, then clicking on each element will show a pop up of the path statement that OSC is expecting from QLC plus to change elements in Synesthesia, but I've been unsuccessful
Now you will get a channel number. You need to increase this by "1"
So in this example from the picture above, I got the channel number of 62882, however for Synesthesia to respond, you need to increase it by 1, so this would be 62883
What QLC wants is this number pasted into the Button.
So I've created a button, in this example a Flash Button,
Select a dummy scene file (this triggers QLC to allow the button to function)
Click on 'CHOOSE"
Select OSC and put in the number that QLC gives you.
Using TouchOSC application (you can install and run this for free, and for testing, its great because the logging in it shows everything that is on the OSC. When you run it, it has a pop up that does a 5-10 second count down before you can use it. But you don't need to buy it to test
Setup the ports and turned on OSC logging, and when you click on a button in Synethesia, you get a whole bunch of stuff being sent when you click on a button. Somewhere in there is the value you want.