Wednesday, March 20, 2019

Asternic Call Center Stats Tweaks

Asternic Call Center Stats PRO

Update displays to reflect a queue NAME versus a number.

Here we see Queue "5000", but instead of 5000, lets have it reflect a name.  In our case we'll make it show "Support" instead.


Select SETUP- PREFERENCES


Select ADD


You'll be presented with a table entry screen


"keyword" = dict_queue

"parameter" = 5000
(you put in whatever the queue number is you want to customize)

value = Support
(put in whatever name you want)


Save your changes

Now look at your queue in the reports


The value should now reflect the change you made.

Issabel Contact Center installation (Agent Mode)

This is how you can create an Inbound call center using the ISSABEL (formerly Elastix) deployment of Asterisk.

This document discusses Issabel's "AGENT" mode.  This is an ACD style center but agents, upon login have their phone engaged to the Queue permanently.  They hear music, and when a call comes in, they are automatically connected to the caller, no phone interaction required.

Click HERE for "CALLBACK AGENT" mode, which is an ACD deployment where agents phone 

The ISSABEL asterisk deployment, based on Centos 7 (as of Jan 2019) is a full featured product provide you not only an asterisk installation, it can also be your email server, fax server and network DHCP server if you so choose.

The biggest feature set of Issable is the Call center portion.

ISSABEL Call Center Features:

Agent login Experience (CallBack model)


Login with a hardset or softset directly and take queue calls.  Pretty normal.

GUI Login with screen pop

Yes!  You have some screen pop ability in a web browser pushing simple information data that is a mix of data caller ID, and a data pulled from a simple CSV file that you upload manually.  And far more complex too, read on!

SCRIPT - This can be used in several ways.  The intended option is to prompt your agent with info about the queue the call has arrived on, and the information they should give to the customer.

You can use it for campaign/queue information (agents can belong to multiple queues so this is a way to allow them to know what queue is calling)   This information can be altered by call center admins, with the data automatically refreshing on all agent screens automatically.

Forms - You can create forms and agents can fill the information in these boxes while on a call, and save it.  Supervisors can run a report to see this data in a CSV file in a spreadsheet program.

CRM - Yes, you can integrate with the CRM.  Vtiger is mentioned alot, and the integration although not completely seamless to get going, is relatively simple in the grand scheme.  At its basic level, the agent can click on the CRM button and be taken to the Vtiger instance, and really be taken to any page you want to provide.

The call center system has the ability to provide dynamic URLs with variables in the URL that can direct users to a customized urls.  In this blog we discuss how to do ticket integration. 

This is the browser window that the agents can use to help interact with the caller.
The top shows the agent phone info (extension 1005- followed by agent name)
The call status bar (our example shows green connected) gives a visual indication if the agent is on a call (its red if they are not).  Shows how long they are talking to customer.

Call control boxes- agents can control the phone call through these buttons.  Take Break allows them to go NOT ready and with a a break type that you can specify.


INSTALLATION

Its pretty easy.  The ISO you download is a complete OS and PBX that will completely install itself on most any computer you have.  Everything is opensource so there isn't anything to buy or licence. to make it work!
It uses the LINUX operating system, but dont worry, if you aren't familar with LInux, there is very very little that you'll probably have to do with it ever really.  The entire installation is automatic.  Just follow the steps bellow and as long as you dont have some hardware incompatibilities, you will be up and running in a short time.

Download Issabel ISO from https://www.issabel.org/     

Discussion below is based on ISSABEL4 20181002.iso with 4 gig of ram and a 50gig HD size.
(ISO available as of January 2019).

You can burn this to a DVD (if you are still stuck in the 2000's) or you can put it on a USB key (https://rufus.ie/) can help you get a bootable USB key.  Maybe your are far more advanced than that and you just install it on a vm.

===============================
There are 4 things you have to know to make an inbound call center installation work:

Install Asterisk 11 only.  13 doesn't work (yet)

MUST have phone registered to even test first time login

Agent MUST be configured properly in PBX queue dynamic or static agent positions.

Do NOT use 3 digit extensions..
==================================

THIS IS VERY IMPORTANT 
For contact center to work, (as of January 2019) 
yomust select the installation of 
*** Asterisk 11 ONLY***


Select Asterisk 11 and Call Center CE in the installation (assuming you want the CC part installed at this time).

Takes 20-30 minutes to install.

After you install, logon with ROOT
and then use the password you assigned during install
at the command prompt then type in IP ADDR and get the IP of your machine.

INBOUND "AGENT" CALL CENTER

The agent 'always being ready for a call'.  This type of call center is known as "Agent" in Issabel.  This is usually used by call centers in an outbound dialer environment.  As soon as the customer answers their phone, the agent is instantly connected, not ringing is heard.  This means the agent has a headset on and is ready to talk.  Issabel plays music in the agents ear, and when the caller is connected, the music stops to indicate the customer is on the line.  Option 2, any agent can logon to any phone.

Login to the GUI using http://IPofIssabel

You'll need to create an account with Issabel websystem to get further updates

If this is a new configuration, please check your NAT settings in Asterisk.  If you are testing phones and your soft/hard phone is on a different network segment than your Issabel installation, it will probably fail


The critical one is putting in your external IP address. That will really cause things to fail
You'll also want to put in local networks that you will have phones in that might be different than the one your PBX is in.  For most cases, if you are a small location you might only have one, but larger offices will split up teams to different network segments so you'll need to include the different ones here.

Creation of an "AGENT" mode (agent auto answer) center

Create an EXTENSION of 1002 in PBX


Save your changes

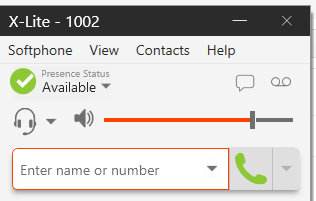
Setup a soft/hard phone with that number.  Make sure its working.  Dialing *43 will put you into an echo test and you can hear your voice.  Make sure your call works for at least 30 - 1 minute without disconnecting.


You will need an activefunctioning registered SIP phone for successful Agent login.  
If phone is not available, the call center will not allow you to login.

Select
Call Center -> Agent Options -> Agents
Select
"NEW AGENT" button


Give it an Agent number, name of Jane Doe and a numeric password

The Agent Number doesn't need to correspond to a phone number here.  This could be a unique employee number or some identifier of this agent.  Useful if you have employees with same or similar names.

Now HERE is the part everyone seems to miss!!!!
The "AGENT NUMBER" you put in MUST BE put in 
"STATIC AGENTS" box in the queue.
!!!!!!!!!!!!!!!!!!!!!!!!!!!!!!!!!!!!!!!!!!!!!!!!!!!!!!!!!!!!!!!!!!!!!!!!!!!!!!


Enter it as A99899,0
It HAS to be prefixed' with an "A" for agent.

Save your changes

Now you want to activate the queue for ISSABEL call center to know to use it.

Now click on INCOMING CALLS
Click on QUEUES
Click on "+Select Queue"

In the "Select Queue:" drop box select the queue you have created. 

You can optionally put in a script.  This text will appear in the agent desktop screen pop

Click on SAVE

Now click on AGENT CONSOLE from the left menu

Select 
AGENT NUMBER
(In our example, select Agent/9888998 Jane Doe)

Then select 
extension 
you want the call to ring to.  Our example will be extension 1002

Press enter.


The agent phone will ring.

Answer the call and you will be prompted 
"Please enter your agent ID"
Enter in the password you gave to the agent and press the # pound/hash key
and you will be logged into the queue "Agent Logged In"

You will hear music in your ear.

TEST

Call the queue.  Your agent, will hear music until the queue delivers him a call.  When he gets the call, the music will stop and the agent will hear a "Beep".

Once they hear the beep, the agent and the caller are joined and they can speak.

Data with inbound call


CONFIGURING "INFORMATION" box

The information box displays CallerID info, plus some information about the call.  You can very easily include customer name information based on the phone number.

Click CALLCENTER - INCOMING CALLS - CLIENTS - DOWNLOAD CONTACTS


If this is your first time, this is a handy way to get the file formation (CSV) and the columns ISSABEL Call Center will want.

The system will expect a CSV file with 4 columns

"Phone","Identification Card","Name","Last Name"

When you create or use the file downloaded it will look like this.  Note, there is no header information in the file.  ISSABEL will match on the CALLERID.  Note.  In the file don't put in special characters, just data.


When a caller arrives at an agent desk, this will do a lookup into the contacts of this CSV file when you have uploaded it and provide data matches where available.  


You can see where we've called in to the queue, the phone number CID number triggered a lookup in the CSV file and displayed the data to the agent.

Friday, February 22, 2019

Issabel Contact Center GUI Tweaks

Here are some modifications you can make to ISSABEL asterisk distribution to make it more customized at a HTML level.

Make sure you backup the files.  If you aren't familiar with HTML JAVA etc one wrong place quote or tick could make the system completely unusable!

Agent Contact Center Desktop:

CUSTOMIZE LOGIN SCREEN MODIFICATIONS
Edit the file:

/var/www/html/modules/agent_console/index.php

On around LINE 180 alter the text in ' ' section on the right. (shown in bold
 'WELCOME_AGENT'         =>  _tr('COMPANYNAME Agent Console'),

Save your changes and reload the page (CTRL+F5) and the title should update

=========================================

MODIFY AGENT CONSOLE TABS

Can change the name of the VTIGER CRM tab that ISSABEL puts in.
I changed mine to CUSTOMER CRM


Edit the file:
/var/www/html/modules/agent_console/index.php

Alter the section in BOLD

    'BTN_VTIGERCRM'  =>  file_exists('/var/www/html/vtigercrm') ? _tr('CUSTOMER CRM') : NULL,

=========================================
Change "END SESSION" to "LOGOUT"
My agents were confused sometimes and would press end session instead of hangup.

Edit the file:
/var/www/html/modules/agent_console/index.php

'BTN_FINALIZAR_LOGIN'           =>  _tr('End Calls and Logout'),


=========================================

Issable has a feature that if you click on the "VTIGER" CRM tab in the agent desktop console window, it will launch VTIGER.  

This tab can be useful for a number of reasons.   One being that even if you DONT have vtiger installed on your system, IF you create the folder called "vtigercrm" in  /var/www/html/ the presence of that directory will make the tab appear in the console.

In my situation I have Vtiger 7 installed in a completely different server, so I created a file called "index.php" in this directory with the following inside the file to direct any web traffic to that directory to the new server.

<?php
        echo "<script> location.href='http://company.com/vtiger7'; </script>";
        exit;
?>

However you could make this tab be anything.  You can rename it (process outlined in this post) and then you can put any URL in there you like.

==============================================
Change the stuff under the "ADMIN" drop down menu
In this example I changed the value from "ISSABEL" to "CONTACT CENTER" 
(we have a product with a similar name and it was causing confusion)

/var/www/html/themes/tenant/themesetup.php

Modify the options in BOLD to be what you want

"CHANGE_PASSWORD"           =>  _tr("Change Issabel Password"),


===============================================================

EDIT "INFO" options

edit the file:
/var/www/html/themes/tenant/_common/_menu.tpl

you'll see options listed.  You can customize and ADD options in!

In this example we copy/pasted some lines and modified them with Hotmail, Reddit and Google to show how you can point to other URL locations

<!-- Profile sub-links -->
<li><a href="#" class="register_link">{$Registered}</a></li>
<li><a href="#" id="viewDetailsRPMs"><i class="fa fa-cube"></i>{$VersionDetails}</a></li>
<li><a href="http://www.issabel.org" target="_blank"><i class="fa fa-external-link"></i>Visit Issabel Website</a></li>
<li><a href="http://www.hotmail.com" target="_blank"><i class="fa fa-external-link"></i>Hotmail</a></li>
<li><a href="http://www.reddit.com" target="_blank"><i class="fa fa-external-link"></i>Reddit</a></li>  
<li><a href="http://www.google.com" target="_blank"><i class="fa fa-external-link"></i>Google</a></li>  
<li><a href="#" id="dialogaboutissabel"><i class="fa fa-info-circle"></i>{$ABOUT_ISSABEL2}</a></li>


===============================================================

Add Additional menus of your own in the Agent console:


You'll notice in this example we've add 2 more menu options, and we've updated the ICON.


edit the file:

/var/www/html/themes/tenant/_common/_menu.tpl

Copy paste the BOLD code and alter it to suite your environment.

            <ul class="dropdown-menu">

                <!-- Reverse Caret -->
                <li class="caret"></li>

                <!-- Profile sub-links -->
                <li><a href="#" class="register_link">{$Registered}</a></li>
                <li><a href="#" id="viewDetailsRPMs"><i class="fa fa-cube"></i>{$VersionDetails}</a></li>
<!--            <li><a href="http://www.issabel.org" target="_blank"><i class="fa fa-external-link"></i>Issabel Website</a></li>  -->
                <li><a href="http://www.hotmail.com" target="_blank"><i class="fa fa-external-link"></i>Hotmail</a></li>
                <li><a href="http://www.reddit.com" target="_blank"><i class="fa fa-external-link"></i>Reddit</a></li>
                <li><a href="#" id="dialogaboutissabel"><i class="fa fa-info-circle"></i>{$ABOUT_ISSABEL2}</a></li>
            </ul>
        </li>

<!------- doubled up code ---->

        <li id="header_notification_bar" class="profile-info dropdown">
            <a data-toggle="dropdown" class="" href="#">
                <i class="fa fa-info-circle"></i>
            </a>
            <ul class="dropdown-menu">

                <!-- Reverse Caret -->
                <li class="caret"></li>

                <!-- Profile sub-links -->
                <li><a href="http://www.google.com" target="_blank"><i class="fa fa-external-link"></i>Google</a></li>
            </ul>
        </li>

<!------ end doubledup code ----->

        <!--li id="header_notification_bar" class="dropdown">
            <a {*data-toggle="dropdown"*} class="" href="index.php?menu=addons">
                <i class="fa fa-cubes"></i>
            </a>


Customize the icon that you click on by altering
<i class="fa fa-info-circle"></i>

Here's a few you can use
fa-cog
fa-laptop
fa-envelope
fa-lock
fa-phone
fa-print
fa-bar-chart-o
fa-comments
fa-book
fa-fax
fa-cubes
fa-plus
fa-tachometer

Icon changed from an "I" to a gauge (tachometer)


You can have a whole bunch of them.  Just repeat the code in bold above then customize each one.


======================================================
AGENT PASSWORD CHANGE SCREEN

You can edit the PASSWORD prompt on the login. Again, we have a product with a similar name so we had agents getting confused.

Alter the password popup box when you click on "CHANGE ISSABEL PASSWORD"

/var/www/html/modules/_issabelutils/index.php

    $jsonObject->set_message(array(
        'title' =>  _tr('Change GUI Password'),
        'html'  =>  $smarty->fetch("$local_templates_dir/_change_password.tpl"),


=========================================================

Modify Login password box.  

My users sometimes get confused between the agent id they logon to the GUI with and the one for their phone.  IE.  jsmith/password01  vs  SIP/1000  / numeric password they key into the phone.  Agents are smart, but we live in a society of too many passwords.

/var/www/html/themes/tenant/_common/login.tpl

=====================================================================
This hack will let you change the Campaign Monitoring screen to show the agent name instead of the just the extension.  its not perfect but its a start.

Just use these 2 lines for each agent you want to change and repeat it for each additional agent.
 if ($agent ['agentchannel'] == "SIP/1001")
     $agent ['agentchannel'] = "John Smith";

Find this code in the file /var/www/html/modules/campaign_monitoring/index.php
function formatoAgente($agent)
{
$sEtiquetaStatus = _tr($agent['status']);
$sFechaHoy = date('Y-m-d');
$sDesde = '-';
switch ($agent['status']) {
case 'paused':
    // Prioridad de pausa: hold, break, agendada
    if ($agent['onhold']) {
        $sEtiquetaStatus = _tr('Hold');
        // TODO: desde cuándo está en hold?
    } elseif (!is_null($agent['pauseinfo'])) {
        $sDesde = $agent['pauseinfo']['pausestart'];
        $sEtiquetaStatus .= ': '.$agent['pauseinfo']['pausename'];
    }
    // TODO: exponer pausa de agendamiento
    break;
case 'oncall':
    $sDesde = $agent['callinfo']['linkstart'];
    break;
}
if (strpos($sDesde, $sFechaHoy) === 0)
    $sDesde = substr($sDesde, strlen($sFechaHoy) + 1);

return array(
    'agent'         =>  $agent['agentchannel'],
    'status'        =>  $sEtiquetaStatus,
    'callnumber'    =>  is_null($agent['callinfo']['callnumber']) ? '-' : $agent['callinfo']['callnumber'],
    'trunk'         =>  is_null($agent['callinfo']['trunk']) ? '-' : $agent['callinfo']['trunk'],
    'desde'         =>  $sDesde,
);
Now insert the 'fix' above the "return array(" section below
EXAMPLE:
 if (strpos($sDesde, $sFechaHoy) === 0)
    $sDesde = substr($sDesde, strlen($sFechaHoy) + 1);

     if ($agent ['agentchannel'] == "SIP/1001")
         $agent ['agentchannel'] = "John Smith";

    return array(
    'agent'         =>  $agent['agentchannel'],
    'status'        =>  $sEtiquetaStatus,
    'callnumber'    =>  is_null($agent['callinfo']['callnumber']) ? '-' : $agent['callinfo']['callnumber'],
    'trunk'         =>  is_null($agent['callinfo']['trunk']) ? '-' : $agent['callinfo']['trunk'],
    'desde'         =>  $sDesde,
);
You can repeat the code for a more agents
if (strpos($sDesde, $sFechaHoy) === 0)
    $sDesde = substr($sDesde, strlen($sFechaHoy) + 1);

     if ($agent ['agentchannel'] == "SIP/1001")
         $agent ['agentchannel'] = "John Smith";

     if ($agent ['agentchannel'] == "SIP/1002")
         $agent ['agentchannel'] = "Barb Dell";

     if ($agent ['agentchannel'] == "SIP/1003")
         $agent ['agentchannel'] = "Jane Doe";

     if ($agent ['agentchannel'] == "SIP/1004")
         $agent ['agentchannel'] = "Maria Jones";

    return array(
    'agent'         =>  $agent['agentchannel'],
    'status'        =>  $sEtiquetaStatus,
    'callnumber'    =>  is_null($agent['callinfo']['callnumber']) ? '-' : $agent['callinfo']['callnumber'],
    'trunk'         =>  is_null($agent['callinfo']['trunk']) ? '-' : $agent['callinfo']['trunk'],
    'desde'         =>  $sDesde,
);

Looks like this:


=====================================================================
MODIFY REPLACE ISSABEL or ELASTIX logos.

If you need to modify the Issabel logos and replace them with your own, just replace this png file.

the main menu logo is located in this directory:

/var/www/html/themes/tenant/images/issabel_logo_mini.png 

Hey I don't want to NOT give Issabel credit for this product, its awesome.  But my login is public facing so I want to avoid advertising the system to reduce chances of exploits being attempted.

This is the reference file - changes it to the new name
The default file is about 200x60 in size.

The file name reference is in the
/var/www/html/themes/tenant/_common/login.tpl

and called "issabel_logo_mini.png"
/var/www/html/themes/tenant/_common/login.tpl

You can make the logo size doubled with the following commands:

sed -i -r 's/width="200"/width="400"/' /var/www/html/themes/tenant/_common/login.tpl
sed -i -r 's/height="62"/height="110"/' /var/www/html/themes/tenant/_common/login.tpl

=================================================================

You can remove the change password option completely
/var/www/html/themes/tenant/_common/_menu.tpl

search for 'password'
Delete these 3 lines
<a href="#" class="setadminpassword"> <i class="fa fa-user"></i> {$CHANGE_PASSWORD}
=============================================================================


Agent Logoin screens
themes/tenant/_common/login.tpl

themes/tenant/_common/index.tpl


grep -R "agent_call" /var/www/html/

Add customer portal to vtiger 7.1.0

Here's what I did to get the Customer Portal to work on an instance of 7.1.0
This was pretty much step by step after an install.  SOME sections might not apply to you. 

ASSUMPTIONS
This is tested on CENTOS 7.0 (based on the install detailed in this blog site)

You might need to change it a little if using another form of OS to suit that OS.
the server ip we are using is 10.1.105.50, so you'll need to change that to your own needs
Also our installation directory for vtiger is "vtigercrm" which might differ from yours.

So, here's what the screen will pretty much look like when you click on the "Customer Portal" for the first time.


In 7.1.0 there's a problem.  The URL is formatted wrong and has an extra " / " in the title that will fail everything right away.

http://ip/vtigercrm//customerportal
That is fixed by editing the file 
/var/www/html/vtigercrm/config.inc.php
 and in the section "$PORTAL_URL" you'll see this " /customerportal

Remove the "/" in front of customer portal.  Should look like this:

$PORTAL_URL = $site_URL.'customerportal';

Save those changes

Now you need to download the customer portal code which is usually separate from Vtiger install.
This threw me for a loop why this code isnt' included with the install.  So you can grab it from source forge.

from cli type this:
cd /tmp
wget https://sourceforge.net/projects/vtigercrm/files/vtiger%20CRM%207.1.0/Add-ons/vtigercrm-customerportal-7.1.0.zip
Now you need to unzip it.
unzip vtigercrm-customerportal-7.1.0.zip
(if you are on centos and need to install unzip type in   " yum -y install unzip " and it will download and install the app)
mv vtigercrm-customerportal-7.1.0 customerportal
mv customerportal/ /var/www/html/scansourcecrm/
chown -R apache:apache /var/www/html/vtigercrm/customerportal
cd /var/www/html/vtigercrm/customerportal
cp config.sample.php config.php
edit the file config.php

You'll see this section in the file


//CRM URL without trialing/
//Example: http://yourdomain.com/crm
'crm.url' => '',
//Portal URL without trialing/
//Example: http://yourdomain.com/portal
'portal.url' => '',


//CRM URL without trialing/
//Example: http://yourdomain.com/crm
'crm.url' => 'http://10.1.105.50/vtigercrm',

//Portal URL without trialing/
//Example: http://yourdomain.com/portal
'portal.url' => 'http://10.1.105.50/vtigercrm/customerportal',


Save those changes

Now, log OUT of Vtiger and log back in

Go to CRM SETTINGS - CONFIGURATION - CUSTOMER PORTAL

Now you should have a logon screen!


If you get an error in this window with something like:

Warning: strftime(): It is not safe to rely on the system's timezone settings.
You are *required* to use the date.timezone setting or the date_default_timezone_set() function.

then you need to edit the /etc/php.ini file

Under [DATE}, make sure you have a valid date.timezone setting in there.  If not add it in (like in bold) and save your changes.  Here is a link of valid time zone syntax


[Date]
; Defines the default timezone used by the date functions
; http://php.net/date.timezone
;date.timezone =
date.timezone = America/Denver

Save your changes enter in

service httpd restart

Should be all fixed